

Following Part 1: introduction & toolchain setup where we saw how to install the required toolchain and start a new app using the Phoenix framework, we'll see how to implement a collaborative todo app with realtime updates.
Todolists aren't something new, in fact, this post is mostly about how I used the Phoenix, React, Redux example article to get something that works.
Prerequisites: having installed Elixir and Phoenix, a reasonable understanding of how React and Redux work.
The code is available at:
0.1 Boostrapping the app
We will create a backend Elixir app and a React front-end who will communicate though Websockets.
$ mix phx.new todo_app --module Todo --app todo --no-html --no-brunch
Edit config/dev.exs with appropriate Postgresql credentials and run:
$ mix ecto.create
0.2 Creating a task API
The phoenix framework comes with code generators, we will use phx.gen.json to generate json views backed by Ecto. As we want a list of tasks for our Todo app, let's proceed:
$ mix phx.gen.json API Task tasks label:string
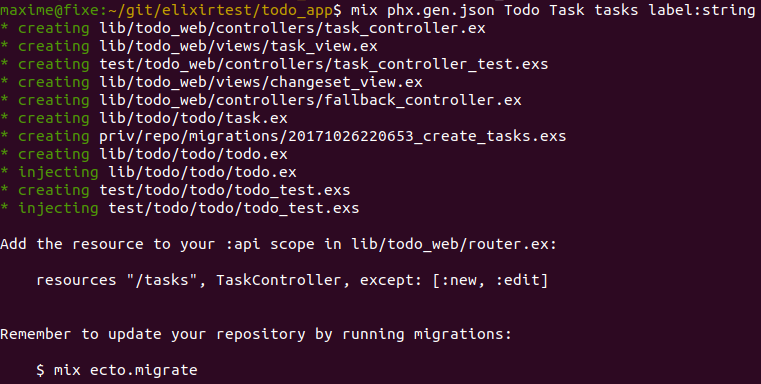
As you can see, the generator gives us a Model, View and a Controller. Add the ressource to the :api scope as indicated:
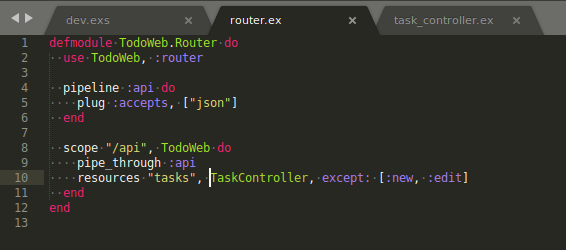
Run mix ecto.migrate and launch the server with mix phx.server and open a webpage localhost:4000.
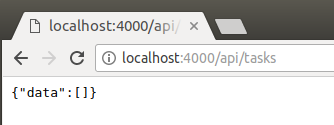
Success ! We get an empty page, the database not being yet populated.
0.3 Doing a Database migration with Phoenix
As you may have noticed, the Task model does not have a field indicating its completion, that's perfect to learn how to do a database migration ! Ecto has a generator for this:
$ mix ecto.gen.migration add_tasks_completed_field
This create an empty Ecto migration in priv/repo/migrations, let's complete it:
defmodule Todo.Repo.Migrations.AddTaskCompletedField do
  use Ecto.Migration

  def change do
    alter table(:tasks) do
      add :completed, :boolean, default: false, null: false
    end
  end
end
And finally run mix ecto.migrate, that's it !
1.1 Build a front-end
The focus of this article not being on how to build a React-Redux app, I'll skip the boring part. Moreover you could download a ready todo app from the Redux examples and just adapt it.
1.2 Connect the Javascript to Elixir though Websockets
Phoenix delivers a phoenix.js well suited to its Channels.
$ yarn add phoenix
import { Socket } from 'phoenix'

export function configureChannel() {
  const socket = new Socket('ws://127.0.0.1:4000/socket');
  socket.connect();
  const channel = socket.channel('tasks');
  return channel
}
If you get 404 errors in the developer tools you may need to configure your Endpoint url host to 127.0.0.1 instead of localhost even though check origin is disabled in dev mode. God knows why, cf. this stackoverflow answer, it almost drove me crazy!
1.3 Connect your redux actions with the Elixir channel
On the client side, the idea is two sided:
- Subscribe to server messages and dispatch redux actions accordingly.
- Push messages to the server on relevant actions.
For example:
// dispatch an update when receiving one from the server
channel.on('update:todo', todo => {
  console.log('update:todo', todo);
  dispatch(updateTodoSuccess(todo));
});

// Below function is called on a component click
// We don't bother dispatching an action here, the server
// will answer with a `delete:todo` message, that will
// update the Redux store.
export function deleteTodo(todo) {
  return dispatch => {
    const payload = { id: todo.id}
    channel.push('delete:todo', payload)
  }
}
1.4 Adapt the backend to talk to the client
Once again there's a generator to create a Channel:
$ mix phx.gen.channel API
* creating lib/todo_web/channels/api_channel.ex
* creating test/todo_web/channels/api_channel_test.exs

Add the channel to your `lib/todo_web/channels/user_socket.ex` handler, for example:

    channel "api:lobby", TodoWeb.APIChannel
The created Channel contains already some code we'll adapt to our use case.
# Channels can be used in a request/response fashion
# by sending replies to requests from the client
def handle_in("ping", payload, socket) do
  {:reply, {:ok, payload}, socket}
end

# It is also common to receive messages from the client and
# broadcast to everyone in the current topic (todo:lobby).
def handle_in("shout", payload, socket) do
  broadcast socket, "shout", payload
  {:noreply, socket}
end
We have two things to do:
- Send a list of the tasks once the client connects
- Have a CRUD interface over websocket
You may think you'll get Task.list_tasks(), serialize it to JSON and send it to the client but the more pythonic way (sorry ;) ) is to use the already created JSON views to do the serialization:
def join("api:lobby", payload, socket) do
  todos = API.Task.list_tasks()
  {:ok, %{tasks: TodoWeb.TaskView.render("index.json", tasks: tasks)}, socket}
end
As for the CRUD interface:
def handle_in("new:todo", payload, socket) do
  {:ok, created} = TodoTest.Todos.create_todo(payload)
  created_json = TodoTestWeb.TodoView.render("todo.json", todo: created)
  broadcast! socket, "new:todo", created_json
  {:reply, {:ok, created_json}, socket}
end

def handle_in("update:todo", payload, socket) do
  todo = TodoTest.Todos.get_todo!(payload["id"])
  TodoTest.Todos.update_todo(todo, payload)
  broadcast! socket, "update:todo", payload
  {:noreply, socket}
end

def handle_in("delete:todo", payload, socket) do
  todo = TodoTest.Todos.get_todo!(payload["id"])
  TodoTest.Todos.delete_todo(todo)
  broadcast! socket, "delete:todo", payload
  {:noreply, socket}
end
And there you have it!
Conclusion
In short I was blown away by how easily the code generators work for you and how Phoenix integrates with websockets through channels. The backend code is very succinct and once you understand how it works, you feel quite productive.
Thanks for reading :)
Photo by Glenn Carstens-Peters on Unsplash